 Did we miss anything on this map? Is there something we didn't discover? Let us know!
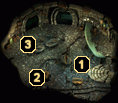
1 - Awaiting-Death, Mortai Gravesend, Norochj, & Sere the Skeptic
Did we miss anything on this map? Is there something we didn't discover? Let us know!
1 - Awaiting-Death, Mortai Gravesend, Norochj, & Sere the Skeptic
There are several Dustmen you'll want to speak with in the Gathering Dust Bar, with four of them located around the entrance at this location.
Awaiting-Death is a faction initiate that has lost the will to live. If you're working with Emoric to become a Dustman, one of your tasks will be to talk some sense into Awaiting-Death. If you've signed a contract with any of the Dustmen in the bar, then Awaiting-Death will quiz you on why you chose to sign one. If you tell him the truth that it's a win-win proposition for you, your alignment will shift further toward Chaotic.
Once you've established why you signed the contract, there are a couple of different ways to talk Awaiting-Death out of dying. First, you can commit suicide yourself to show him death firsthand. Secondly, you can offer to end his life for him, but when you start strangling him he will decide that he would rather live. Make sure you don't follow through with killing him at this point or everyone in the bar will turn hostile. If you accept any money for trying to kill him, keep in mind that you alignment will shift further toward Evil. Once you've convinced Awaiting-Death that he doesn't want to die, you'll earn 500 experience points.
Mortai Gravesend is the guy you need to talk to if you're trying to resolve the contract problem for Angyar in
the northeast section of the Hive. Regardless of the outcome of that ordeal, Mortai will offer to pay you 50 coppers for a death contract of your own. If you tell him that you were already considering signing a contract for Emoric at area #3, Mortai will increase the amount he's willing to pay to 100 coppers. If you agree to sign a contract, you'll earn a total of 750 experience points.
Norochj is the one who placed an advertisement on "The Post" outside the Gathering Dust Bar. He's looking for someone to investigate why the undead are being disturbed in the
Mausoleum, which can be reached by entering a portal to the north of the Gathering Dust Bar (Norochj teaches you the semi-circle gesture needed to invoke the portal). If you agree to the task and return victorious, you'll receive 1000 experience points. With a charisma of 13-15, Norochj will also give you 200 coppers. With a charisma of 16+, he'll bump this amount to 300 coppers and also hand over three
Bandages.
In addition to the Mausoleum quest, Norochj will also ask you to track down an imposter within the Hive that is posing as a Dustman. This "not-Dustman" is a guy named Ash-Mantle, and you'll find him just south of the marketplace in
the southwest portion of the Hive. Deal with the imposter however you see fit, then return to Norochj for 750 experience points. As with the Mausoleum quest, your charisma affects further rewards. With a charisma of 13-15 you'll receive 200 coppers, but with a charisma of 16+ you'll receive 300 coppers and three
Bandages.
Sere the Skeptic is having doubts about her Dustmen beliefs. Talk with her for a bit and she will reveal to you that she is afraid of dying. If you ask her what has caused this "crisis of faith", she'll tell you how she feels about the faction and then ask for your advice. Steer her in whatever direction you'd like for 500 experience points. If you have previously joined the Anarchist faction, you can convince her to defect from the Dustmen and follow your cause instead. This will earn you another 1000 experience points.
2 - Old Coppereyes
Old Coppereyes doesn't serve much of a purpose other than to offer to sign a death contract with you. Signing a contract with him will earn you 50 coppers and a total of 750 experience points, unless you previously signed another Dustman's contract. If that's the case, then you'll still receive 250 experience points, but your alignment will shift further toward Chaotic for signing multiple contracts.
3 - Emoric
If you're looking to join the Dustmen faction, then Emoric is the one you'll want to talk with. After some introductory dialogue, Emoric will send you over to Norochj to deal with the Mausoleum issues and the Dustman imposter.
After completing both of Norochj's quests, return to Emoric and he will ask you to speak with Awaiting-Death to convince him that he doesn't want to die. Once you've completed this task, Emoric will then have you speak with Sere the Skeptic about her doubts of the Dustmen faction.
When you're satisfied with the outcome you've had with Sere, return once again to Emoric. As a final task, Emoric will send you to investigate the whereabouts of Soego, the Dustman you may or may not have previously met in the Mortuary. You won't encounter him again until you reach the
Dead Nations, though.
After you've found Soego and discovered his secret, return one last time to Emoric and you'll be given the opportunity to join the Dustmen faction. Joining will earn you 2500 experience points (1000 if you're already a member of another faction), allow you to access the Dustmen Vault (items are listed below), and will give the Nameless One a +4 bonus to his Armor Class vs. Undead as part of the Dead Truce innate ability. Just don't tell Emoric that you're immortal or he will force you to renounce the faction.
You can also inquire about Pharod to Emoric and he will tell you that the Collector has been selling the Dustmen some very old corpses. If you agree to investigate the matter and tell Emoric everything you know after visiting Pharod in the
Buried Village, you'll earn 2500 experience points and 300 coppers.


